Control BB-8 by XPages on bluemix and IBM IoT Foundation (2/2)
Continue from previous post
This blog is the part 2 of Control BB-8 by XPages on bluemix and IBM IoT Foundation (1/2).
In the previous post, I explained how to configure Bluetooth device to use by node.js on windows.
- 1. To control BLE on Windows
- 2. Get UUID of Bluetooth
3. Get BB8-Bluemix project from GitHub
Surprisingly there is the project named BB8-Bluemix on the GitHub to manipulate the BB-8 via MQTT(IoT). So please get the project code from following URL.
https://github.com/shamimshossain/bb8-bluemix
As the next step, open command prompt and change directory to project folder, then install by issuing “npm install”.I got some dependencies warning messages, but it didn’t interfere the BB-8 manipulation, so I just leave it as it is.
![]()
After install is completed, open the spheroDemo.js file and replace the parameter of sphero() function on line 3 by Bluetooth UUID which you got from the previous step. The UUID seems to be more than 20 characters on MAC OS, but it was 12 characters on my windows OS.
var mqtt = require('./mqtt-wrapper.js')();
var sphero = require('sphero'),
bb8 = sphero('cxxxxxxxxxx3'); // change BLE address accordingly

bb8.connect(function() {

 console.log('**** Start debug info *****');
 console.log('Connected to BB-8');
.................
... truncated ...
.................
4. Create “Internet of Things Platform Starter” application on Bluemix
- Login to bluemix.net
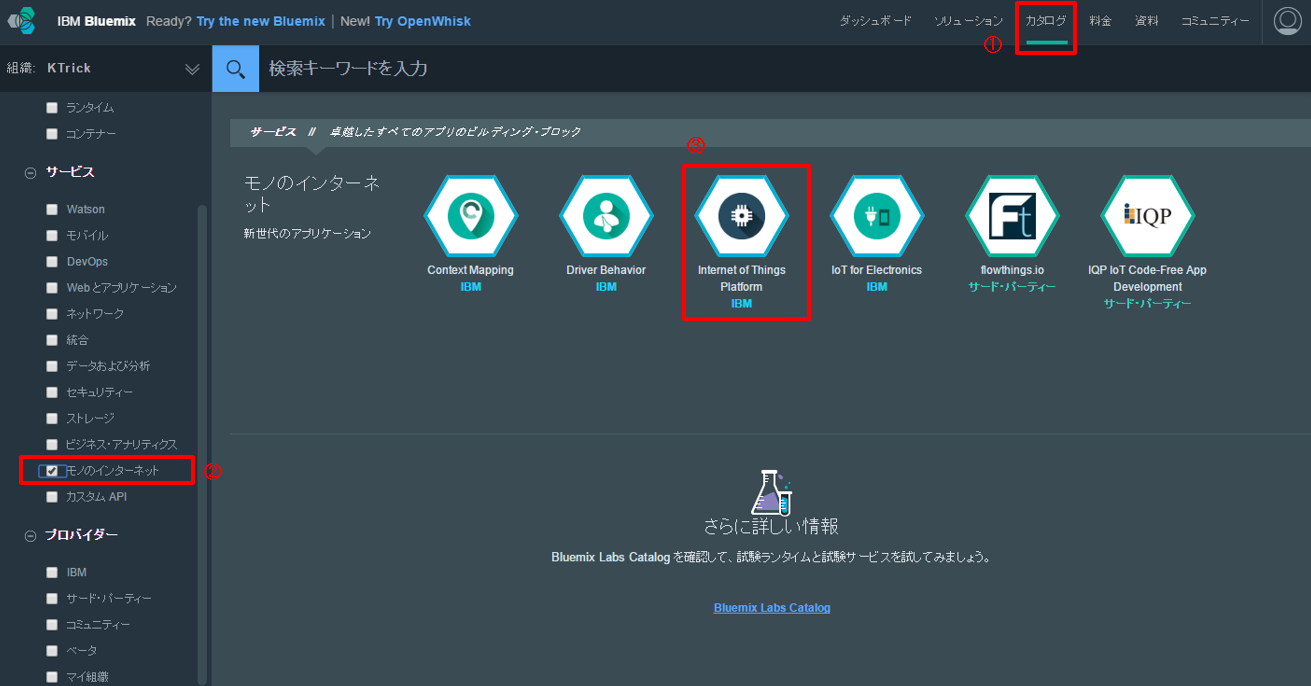
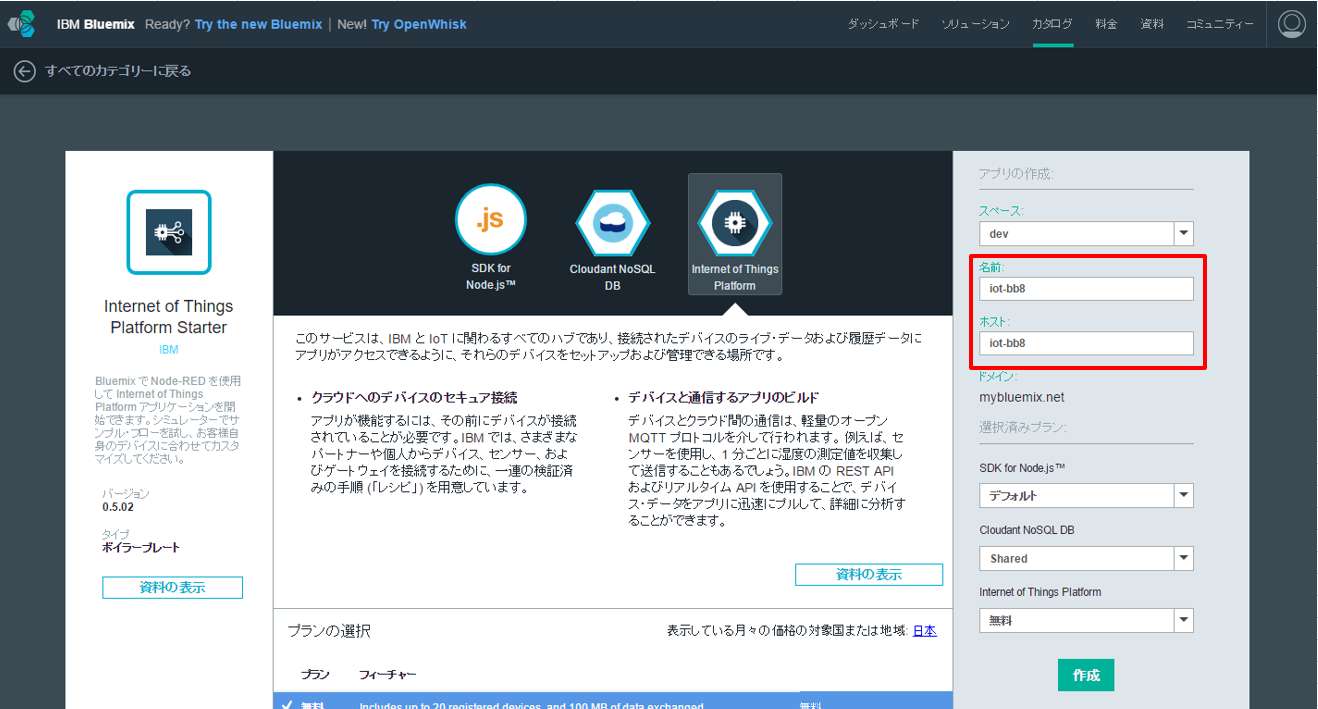
- Select “Internet of Things Platform Starter” from Catalog.

- Specify your preffered value to the name and host, then click Create button
5. Add device on IoT Foundation
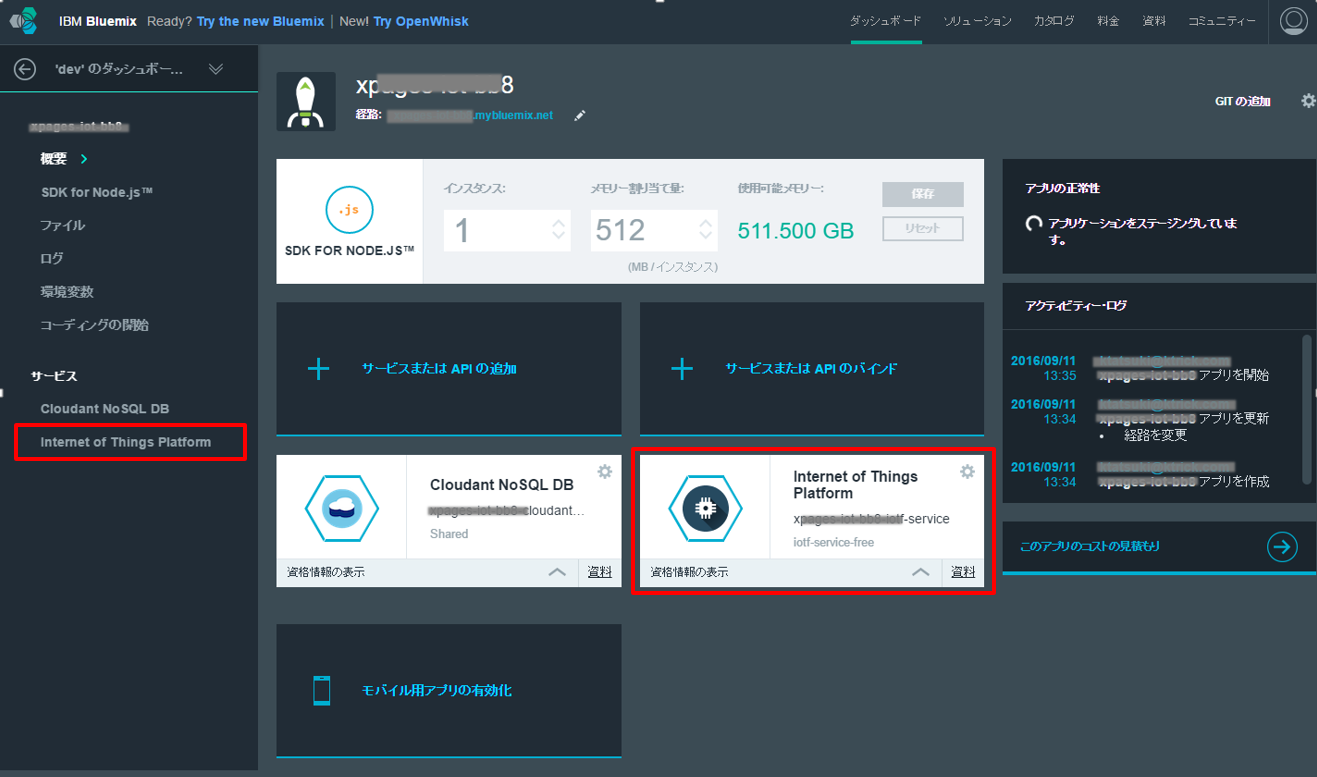
- After staging the application, select “Internet of Things Platform” from the left navigation.
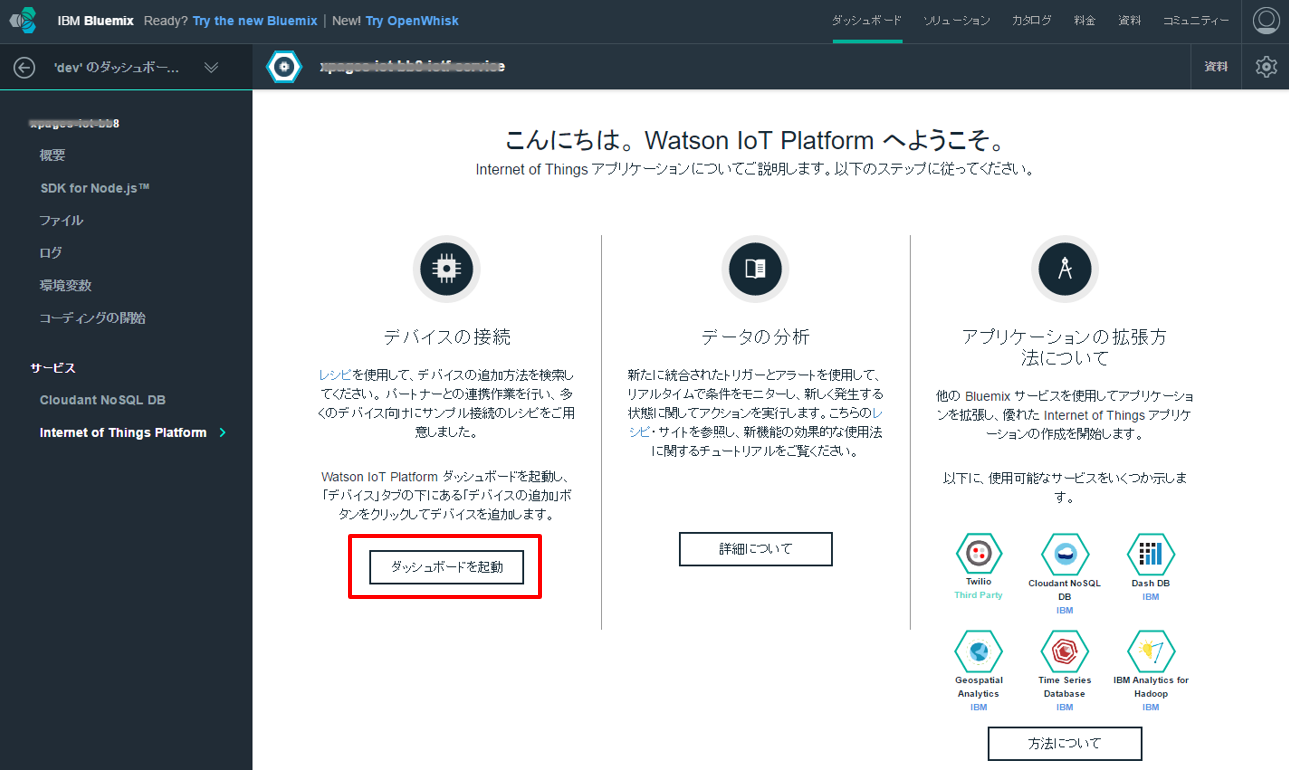
- Click “Launch Dashboard” from device connection.
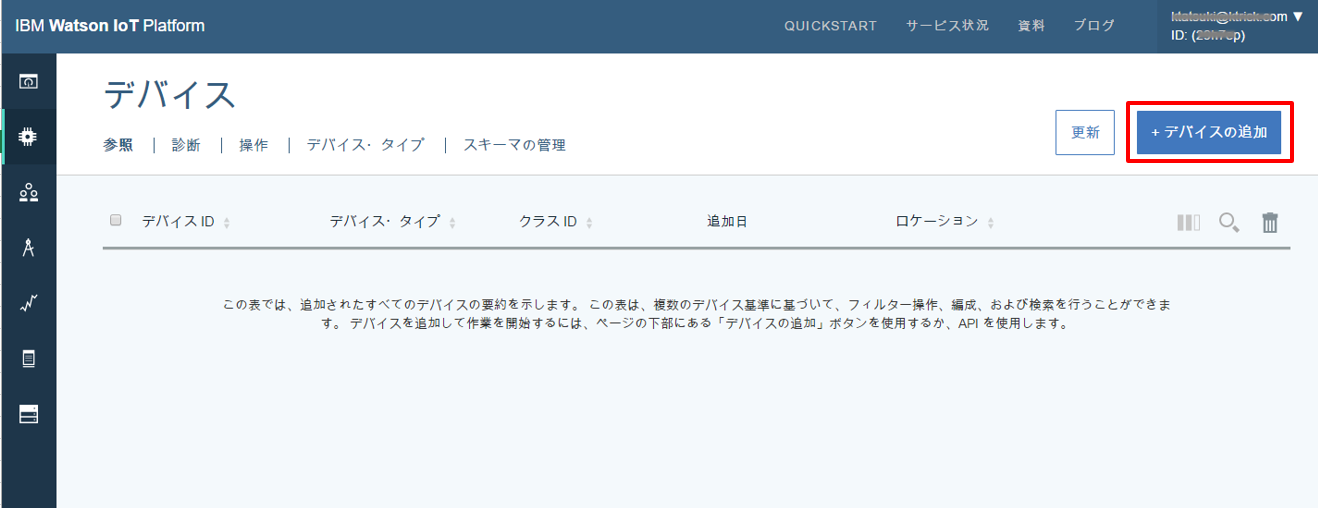
- Click “Add device” after “IBM Watson IoT Platform” page is opened.
- After popup the wizard, select “Create Device Type”, then next./li>
- “Create Device Type” ‐ In “general information” Type “sphero” for the device name, then next.
- “Create Device Type” ‐ In “Template definition” just click next.
- “Create Device Type” ‐ In “Send information” just click next.
- “Create Device Type” ‐ In “Metadata(Option)”just click create.
- Select the device type you created above for the “Select Device Type” field, then next.
- In “Device Information” Specify preferred value for “Device ID”, then next.
- In “Metadata” just click next.
- In “Security” just click next.
- In “Overview” just click add button.
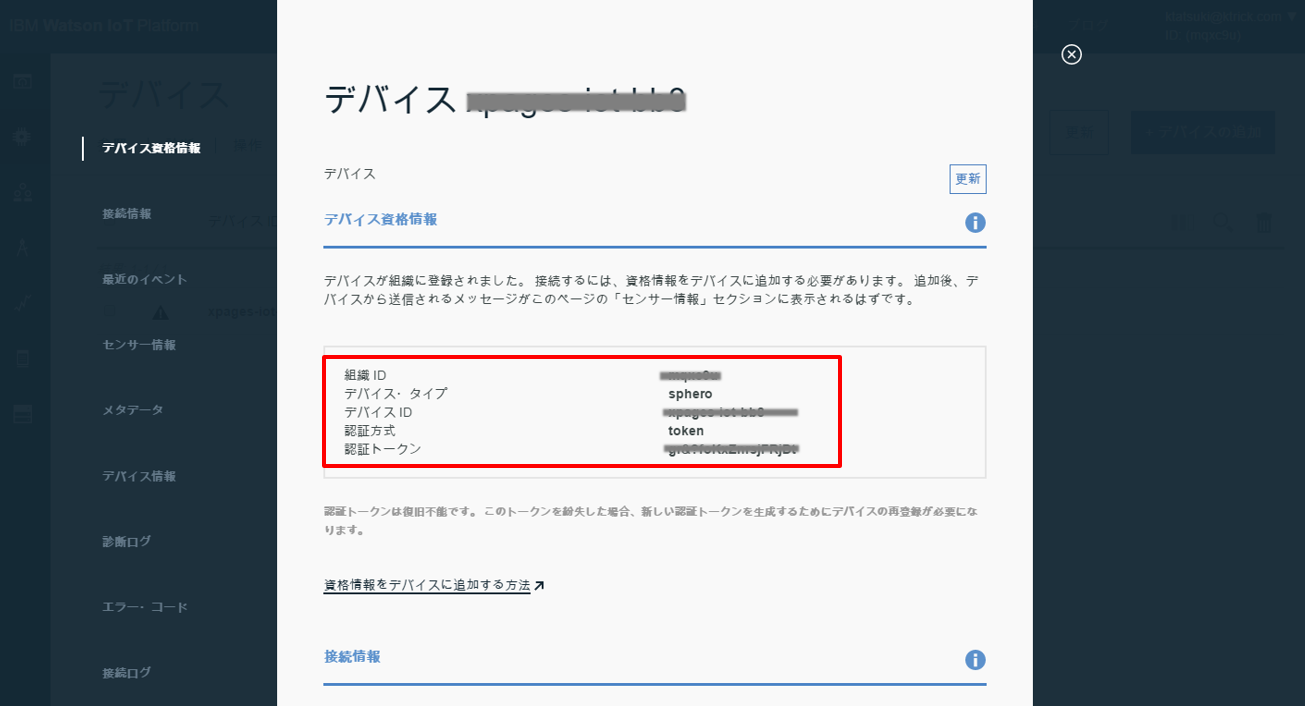
- After displaying the device qualification information, Please copy and keep the values in the red color rectangle.
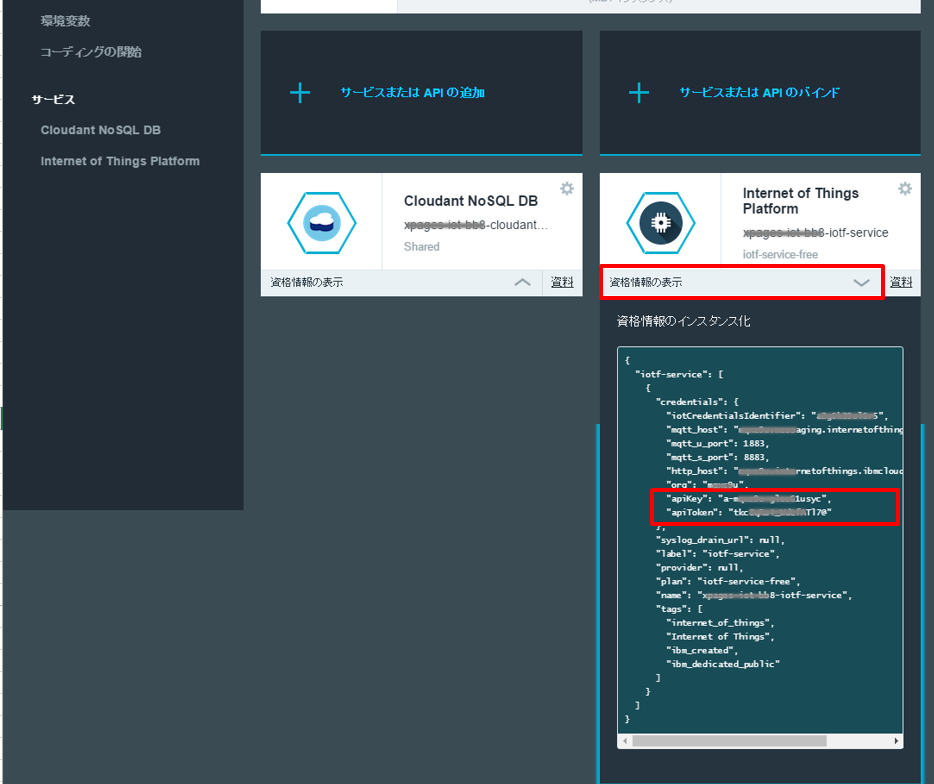
- After all done the above steps, back to dashboard of “Internet of Things Platform Starter” then check apiKey and apiToken by clicking “display
qualification info”
6. Configure properties file of BB8-Bluemix project
Go to BB8-Bluemix project folder and open sphero-config.properties.
Please edit the following lines:
#Device ID you use when you register with the IoT foundation
deviceid=xxxxxxxxx-xxx

#For controller (device)
authtoken=grxxxxxxxxxxxjDt
#For the app (publisher)
apikey=a-mxxxxu-gloxxxxxxc
apitoken=tkxxxxx4_Wxxxxxxx@
- deviceid: Specify the Device ID that you used when registering BB-8 on IBM Watson IoT Platform
- authtoken: Specify the authentication token that you got when registering the BB-8 on IBM Watson IoT Platform
- apikey, apitoken: Specify apikey and apiToken written in “IBM Watson IoT Platform” qualification info
7. Test via Node-Red
Find the Node-Red sample flow form the bottom of the link page bb8-bluemix.
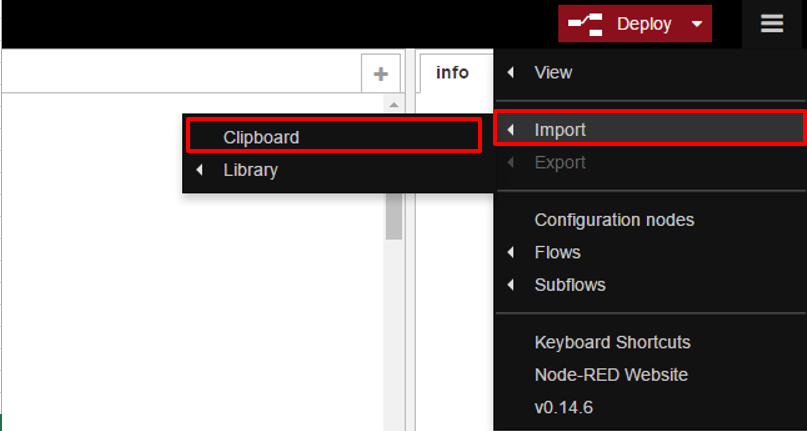
- bb8-bluemix Copy the Node-Red json code.(below is the same sample flow)
[{"id":"180c60f4.e7f39f","type":"ibmiot out","z":"5fa8453c.a057bc","authentication":"boundService","apiKey":"","outputType":"cmd","deviceId":"spheroownedbyshamim","deviceType":"sphero","eventCommandType":"run","format":"json","data":"___","name":"IBM IoT App Out","service":"registered","x":756,"y":361,"wires":[]},{"id":"b7792b22.4886d8","type":"inject","z":"5fa8453c.a057bc","name":"Run command","topic":"","payload":"","payloadType":"none","repeat":"","crontab":"","once":false,"x":206,"y":444,"wires":[["f29b07a3.0d64f8"]]},{"id":"f29b07a3.0d64f8","type":"function","z":"5fa8453c.a057bc","name":"Construct RUN command","func":"msg.payload = JSON.stringify({\n d: {\n action : \"#spherorun\"\n }\n});\nreturn msg;","outputs":1,"noerr":0,"x":468,"y":449,"wires":[["180c60f4.e7f39f","d1c575b9.2e3a88"]]},{"id":"d313ea30.2cec18","type":"inject","z":"5fa8453c.a057bc","name":"Change color to RED","topic":"","payload":"","payloadType":"none","repeat":"","crontab":"","once":false,"x":205,"y":297,"wires":[["26e811fe.d917ee"]]},{"id":"26e811fe.d917ee","type":"function","z":"5fa8453c.a057bc","name":"Construct RED command","func":"msg.payload = JSON.stringify({\n d: {\n action : \"#red\"\n }\n});\nreturn msg;","outputs":1,"noerr":0,"x":473,"y":287,"wires":[["180c60f4.e7f39f","d1c575b9.2e3a88"]]},{"id":"61c2c549.9e3d3c","type":"inject","z":"5fa8453c.a057bc","name":"Change color to BLUE","topic":"","payload":"","payloadType":"none","repeat":"","crontab":"","once":false,"x":193,"y":369,"wires":[["18100517.e7effb"]]},{"id":"18100517.e7effb","type":"function","z":"5fa8453c.a057bc","name":"Construct BLUE command","func":"msg.payload = JSON.stringify({\n d: {\n action : \"#blue\"\n }\n});\nreturn msg;","outputs":1,"noerr":0,"x":485,"y":363,"wires":[["180c60f4.e7f39f","d1c575b9.2e3a88"]]},{"id":"d1c575b9.2e3a88","type":"debug","z":"5fa8453c.a057bc","name":"","active":true,"console":"false","complete":"false","x":777,"y":286,"wires":[]}] - Launch Node-Red from the application URL of “Internet of Things Platform Starter” that you created in step 4.
- Paste the Node-Red flow by following the steps in the screenshot.
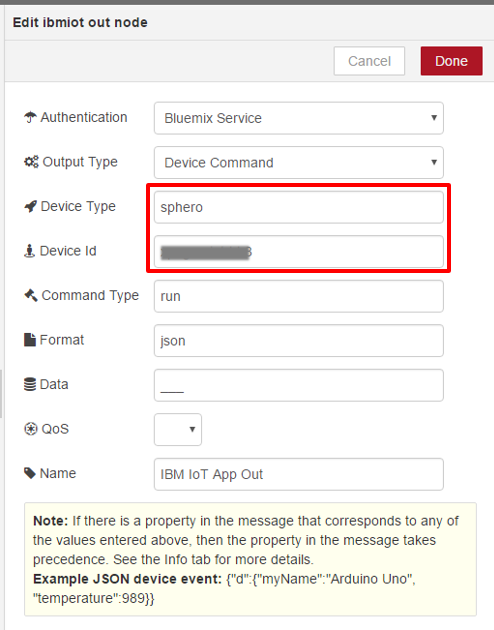
- Configure the “IBM IoT App Out” node by double-click
– Specify Device Type “sphero” which you used in IoT Foundation.
– Specify device Id that you used when registering the device on IoT Foundation - Save Node-Red flow by clicking “Deploy” button.
As the final step, execute spheroDemo.js from command prompt and establish IoT on bluemix connection, then click “Change color to Red/Blue” on Node-Red. If you succeed, you can see BB-8 color is changed.
8. Create XPages on Bluemix application
Finally I can write something about XPages! Please follow the steps to create the BB-8 xpages app.
- Select XPages runtime from Bluemix catalog.
- Specify preferred name and host and then create the new XPages application.
- After staging XPages application, please download starter code. You will be able to find application.nsf
9.Deploy BB-8 Xpages app
Please download the BB-8 xpages application template from the following link:
Download Link: http://ktrick.com/download/xpages-bb8-tpl.zip
Please simply replace the design against your bluemix-xpages application (application.nsf), or copy the design of XPages, scriptLibrary, resources(file), stylesheets from the template.
As the last step, please replace the red rectangle lines of sp_mqtt_bb8.js by your IoT information.
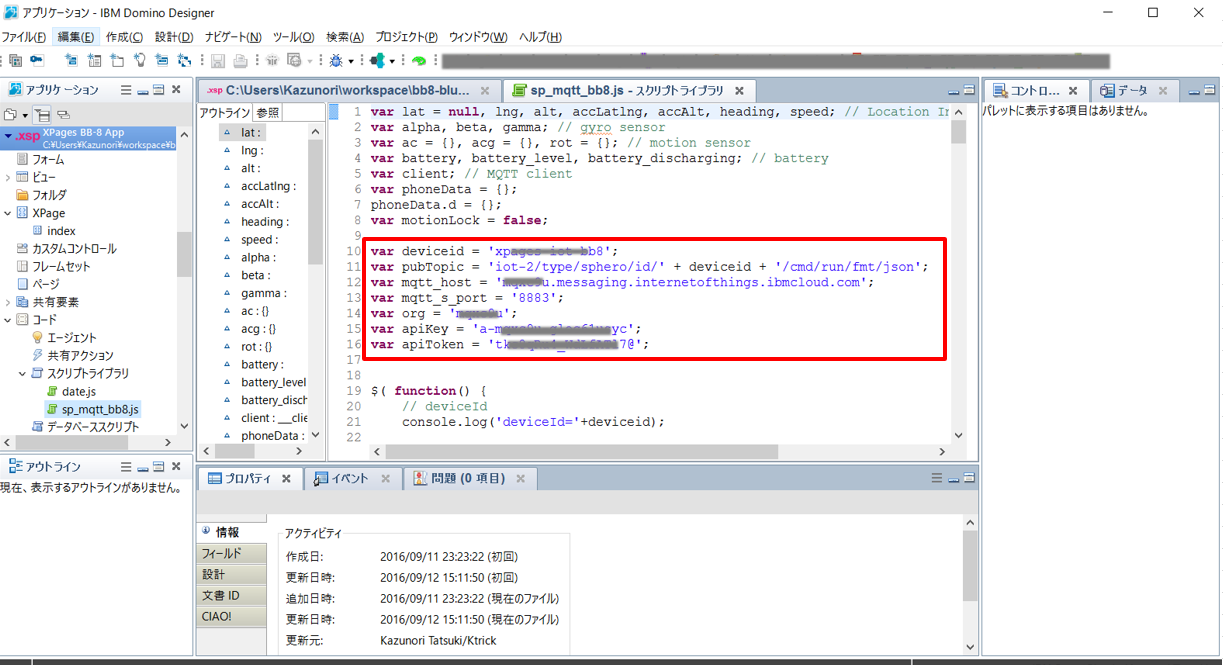
Information is also written in “IBM Watson IoT Platform” qualification info
- deviceid: Device ID
- pubTopic: If device type is not sphero, then replace as you need
- mqtt_host: Specify “mqtt_host” of qualification info
- mqtt_s_port: Specify “mqtt_s_port” of qualification info
- org: Specify “org” of qualification info
- apiKey: Specify “apiKey” of qualification info
- apiToken: Specify “apiToken” of qualification info
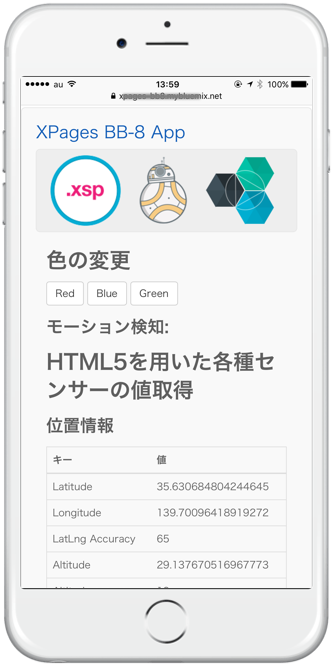
After replacing the design and deploy to the Bluemix, you will be able to see the following top page.
10. Test by XPage app
Step1, Execute spheroDemo.js to establish the connection between BB-8 and IoT Foundation.
Step2, Open the xpages app by your smartphone device.
In this XPAGES app, you can manipulate BB-8 by moving your smartphone like back-forward-right-left. Technically this app is using HTML5+Javascript for motion sensor and paho javascript client to publish MQTT to IoT Foundation.
You can manipulate BB-8 like this movie:
I hope I can explain the inside technology of xpage app in my next blog, and maybe using Paho Java client as further more step. In fact this app does not need to be xpages since client side Javascript does everything. But I hope this helps some other imagination of using XPages, IoT, Bluemix other services.